Image manipulation with @napi-rs/canvas
Setting up @napi-rs/canvas
@napi-rs/canvas is an image manipulation tool that allows you to modify images with code. We'll explore how to use this module in a slash command to make a profile command.
TIP
This guide is last tested with @napi-rs/canvas^0.1.25, so make sure you have this or a similar version after installation.
WARNING
Be sure that you're familiar with things like async/await and object destructuring before continuing, as we'll be making use of features like these.
Package installation
Run the following command in your terminal:
npm install @napi-rs/canvas
yarn add @napi-rs/canvas
pnpm add @napi-rs/canvas
bun add @napi-rs/canvas
Getting started
Here is the base code you'll be using to get started:
const { AttachmentBuilder, Client, Events, GatewayIntentBits } = require('discord.js');
const Canvas = require('@napi-rs/canvas');

const client = new Client({ intents: [GatewayIntentBits.Guilds] });

client.once(Events.ClientReady, readyClient => {
	console.log(`Ready! Logged in as ${readyClient.user.tag}`);
});

client.on(Events.InteractionCreate, interaction => {
	if (!interaction.isChatInputCommand()) return;

	if (interaction.commandName === 'profile') {
		// ...
	}
});

client.login('your-token-goes-here');
2
3
4
5
6
7
8
9
10
11
12
13
14
15
16
17
18
WARNING
Remember to register the slash commands before continuing on with this section of the guide. You can view how to do that here.
Basic image loading
The end goal will be to display the user's avatar and nickname.
After importing the @napi-rs/canvas module and initializing it, you should load the images. With @napi-rs/canvas, you have to specify where the image comes from first, naturally, and then specify how it gets loaded into the actual Canvas using context, which you will use to interact with Canvas.
TIP
@napi-rs/canvas works almost identical to HTML5 Canvas. You can read the HTML5 Canvas tutorials on w3Schoolsopen in new window and MDNopen in new window for more information later!
client.on(Events.InteractionCreate, async interaction => {
	if (!interaction.isChatInputCommand()) return;

	if (interaction.commandName === 'profile') {
		// Create a 700x250 pixel canvas and get its context
		// The context will be used to modify the canvas
		const canvas = Canvas.createCanvas(700, 250);
		const context = canvas.getContext('2d');
		// ...
	}
});
2
3
4
5
6
7
8
9
10
11
Now, you need to load the image you want to use into Canvas.
We'll be using this imageopen in new window as the background in the welcome image, but you can use whatever you want. Be sure to download the file, name it wallpaper.jpg, and save it inside the same directory as your main bot file.
client.on(Events.InteractionCreate, async interaction => {
	// ...
	const context = canvas.getContext('2d');

	const background = await Canvas.loadImage('./wallpaper.jpg');

	// This uses the canvas dimensions to stretch the image onto the entire canvas
	context.drawImage(background, 0, 0, canvas.width, canvas.height);

	// Use the helpful Attachment class structure to process the file for you
	const attachment = new AttachmentBuilder(await canvas.encode('png'), { name: 'profile-image.png' });

	interaction.reply({ files: [attachment] });
});
2
3
4
5
6
7
8
9
10
11
12
13
14

TIP
If you get an error such as Error: ENOENT: no such file or directory, then the file's provided path was incorrect.
Manipulating images
Next, let's place a border around the image for the sake of demonstration purposes.
client.on(Events.InteractionCreate, async interaction => {
	// ...
	context.drawImage(background, 0, 0, canvas.width, canvas.height);

	// Set the color of the stroke
	context.strokeStyle = '#0099ff';

	// Draw a rectangle with the dimensions of the entire canvas
	context.strokeRect(0, 0, canvas.width, canvas.height);
	// ...
});
2
3
4
5
6
7
8
9
10
11
A bit plain, right? Fear not, for you have a bit more to do until you reach completion. Since this guide page's goal is focused more on actual code than design, let's place a basic square-shaped avatar for now on the left side of the image. In the interest of coverage, you will also make it a circle afterward.
const { request } = require('undici');

client.on(Events.InteractionCreate, async interaction => {
	// ...
	context.strokeRect(0, 0, canvas.width, canvas.height);

	// Using undici to make HTTP requests for better performance
	const { body } = await request(interaction.user.displayAvatarURL({ extension: 'jpg' }));
	const avatar = await Canvas.loadImage(await body.arrayBuffer());

	// If you don't care about the performance of HTTP requests, you can instead load the avatar using
	// const avatar = await Canvas.loadImage(interaction.user.displayAvatarURL({ extension: 'jpg' }));

	// Draw a shape onto the main canvas
	context.drawImage(avatar, 25, 0, 200, canvas.height);
	// ...
});
2
3
4
5
6
7
8
9
10
11
12
13
14
15
16
17
![]()
It works well, but the avatar image itself seems a bit stretched out. Let's remedy that.
client.on(Events.InteractionCreate, async interaction => {
	// ...
	const { body } = await request(interaction.user.displayAvatarURL({ extension: 'jpg' }));
	const avatar = await Canvas.loadImage(await body.arrayBuffer());

	// Move the image downwards vertically and constrain its height to 200, so that it's square
	context.drawImage(avatar, 25, 25, 200, 200);
	// ...
});
2
3
4
5
6
7
8
9
![]()
The purpose of this small section is to demonstrate that working with Canvas is essentially a hit-and-miss workflow where you fiddle with properties until they work just right.
Since we covered how to load external images and fix dimensions, let's turn the avatar into a circle to improve the image's overall style.
client.on(Events.InteractionCreate, async interaction => {
	// ...
	context.strokeRect(0, 0, canvas.width, canvas.height);

	// Pick up the pen
	context.beginPath();

	// Start the arc to form a circle
	context.arc(125, 125, 100, 0, Math.PI * 2, true);

	// Put the pen down
	context.closePath();

	// Clip off the region you drew on
	context.clip();
	// ...
});
2
3
4
5
6
7
8
9
10
11
12
13
14
15
16
17
![]()
TIP
You can read more about context.arc() on w3schoolsopen in new window or MDNopen in new window.
Adding in text
Now, let's quickly go over adding text to your image. This will help make the purpose of this image apparent since currently, it's just an avatar floating on a starry background that comes out of nowhere.
client.on(Events.InteractionCreate, async interaction => {
	// ...
	context.strokeRect(0, 0, canvas.width, canvas.height);

	// Select the font size and type from one of the natively available fonts
	context.font = '60px sans-serif';

	// Select the style that will be used to fill the text in
	context.fillStyle = '#ffffff';

	// Actually fill the text with a solid color
	context.fillText(interaction.member.displayName, canvas.width / 2.5, canvas.height / 1.8);
	// ...
});
2
3
4
5
6
7
8
9
10
11
12
13
14
TIP
If you get an error like Fontconfig error: Cannot load default config file, it means you do not have any fonts installed on your system. On Linux, you can run the following command to fix this: sudo apt-get install fontconfig. This might also need to be installed if you see boxes where the text should be. As for Windows, you will need to find a way to install fonts.
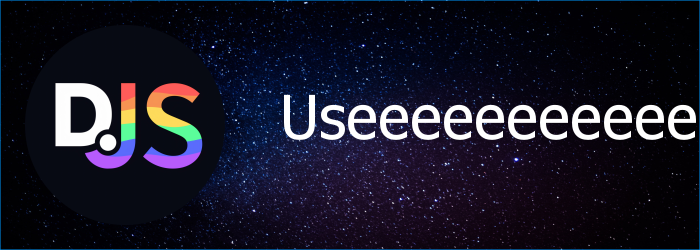
You may have noticed or considered that if a member's username is too long, then the output won't be quite nice. This is because the text overflows out of the canvas, and you don't have any measures in place for that. Let's take care of this issue!
// Pass the entire Canvas object because you'll need access to its width and context
const applyText = (canvas, text) => {
	const context = canvas.getContext('2d');

	// Declare a base size of the font
	let fontSize = 70;

	do {
		// Assign the font to the context and decrement it so it can be measured again
		context.font = `${fontSize -= 10}px sans-serif`;
		// Compare pixel width of the text to the canvas minus the approximate avatar size
	} while (context.measureText(text).width > canvas.width - 300);

	// Return the result to use in the actual canvas
	return context.font;
};

client.on(Events.InteractionCreate, async interaction => {
	// ...
	context.strokeRect(0, 0, canvas.width, canvas.height);

	// Assign the decided font to the canvas
	context.font = applyText(canvas, interaction.member.displayName);
	context.fillStyle = '#ffffff';
	context.fillText(interaction.member.displayName, canvas.width / 2.5, canvas.height / 1.8);
	// ...
});
2
3
4
5
6
7
8
9
10
11
12
13
14
15
16
17
18
19
20
21
22
23
24
25
26
27
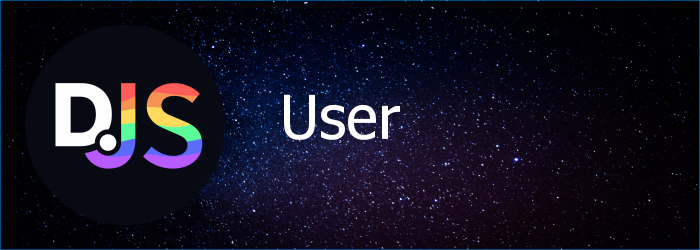
Before adjustment:
After adjustment:
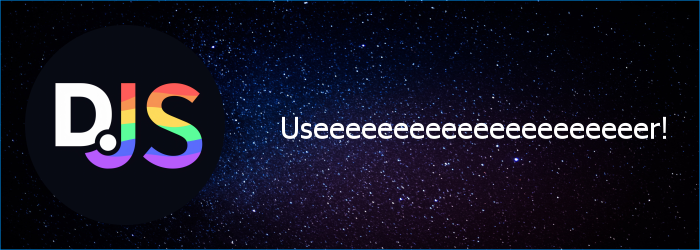
Let's move the welcome text inside the image itself instead of adding it outside as a nice finishing touch.
client.on(Events.InteractionCreate, async interaction => {
	// ...
	context.strokeRect(0, 0, canvas.width, canvas.height);

	// Slightly smaller text placed above the member's display name
	context.font = '28px sans-serif';
	context.fillStyle = '#ffffff';
	context.fillText('Profile', canvas.width / 2.5, canvas.height / 3.5);

	// Add an exclamation point here and below
	context.font = applyText(canvas, `${interaction.member.displayName}!`);
	context.fillStyle = '#ffffff';
	context.fillText(`${interaction.member.displayName}!`, canvas.width / 2.5, canvas.height / 1.8);
	// ...
});
2
3
4
5
6
7
8
9
10
11
12
13
14
15
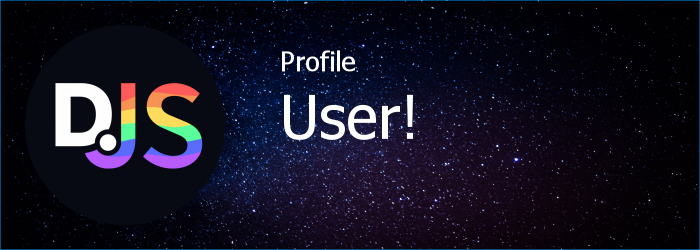
And that's it! We have covered the basics of image manipulation, text generation, and loading from a remote source.
Resulting code
If you want to compare your code to the code we've constructed so far, you can review it over on the GitHub repository here open in new window.